
How to Make a Sourdough Starter and Know When It Is Ready
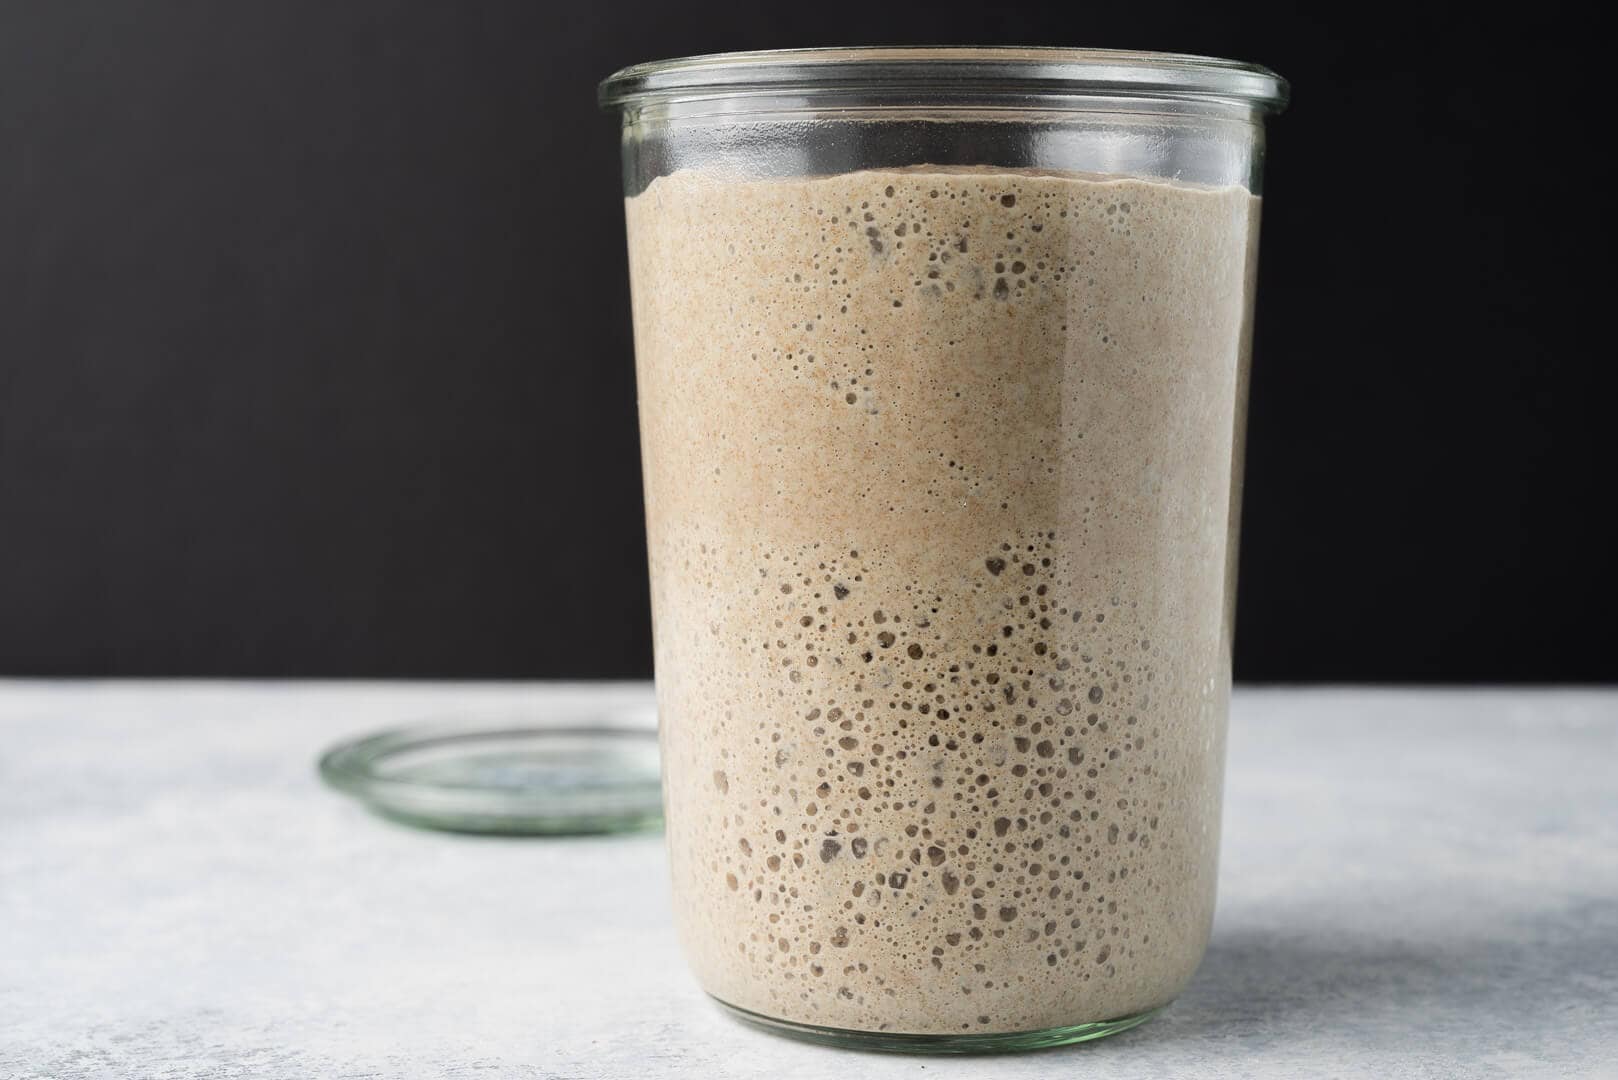
To make a sourdough starter, mix flour and water, then feed the mixture regularly while a stable culture of wild yeast and bacteria develops. The starter is ready for baking when it rises predictably after feeding and shows healthy fermentation over several cycles. A dramatic rise on one early day is not enough to prove it can raise bread reliably.
Making a starter requires patience more than complicated equipment. Temperature, flour, water, and feeding routine all affect development. Some starters become dependable within a week or two, while others take longer. Follow the culture’s behavior rather than a promise that every jar will be ready on exactly the same day.
Gather Simple Equipment
Use a clean jar with enough space for the mixture to expand, a kitchen scale, and a spoon or spatula. A clear container helps you see bubbles and the rise line. Mark the starting level with a band or a removable marker so that growth is easy to compare.
Choose a cover that prevents contamination without trapping pressure in a tightly sealed vessel. Follow the container’s guidance and avoid an airtight setup during active fermentation. Keep the rim and outside clean so dried mixture does not obscure the level.
You do not need a large jar of starter at the beginning. A small culture uses less flour and is easier to feed consistently. Keep notes on feeding time, flour, temperature, and rise rather than relying on memory when the behavior changes.
Choose Flour and Water
Whole wheat or rye flour can be useful at the beginning because it brings nutrients and microbial diversity. You can later maintain the starter with suitable white flour or a blend. Avoid changing several flour types every day while trying to interpret progress.
Use clean drinking water. If strongly treated water seems to cause difficulty, consider a suitable filtered water source. Do not assume mineral-free water is automatically better. The useful choice is water that is safe and works consistently with your flour.
Equal weights of flour and water produce a starter commonly described as one hundred percent hydration. Equal volumes do not mean the same thing because water and flour have different densities. A scale makes the mixture and feeding ratios much clearer.
Start With a Small Mixture
On the first day, combine 30 grams of flour with 30 grams of water and stir until no dry pockets remain. Scrape the sides, mark the level, and cover appropriately. Place the jar in a comfortably warm area away from direct sun and excessive heat.
The mixture may be thick or paste-like depending on the flour. That is normal. Avoid adding sugar, fruit, or other ingredients simply because activity is not immediate. Flour and water are enough for a basic starter, and extra ingredients create more variables.
Check the jar over the next day without repeatedly stirring it. Note any bubbles or changes in smell. Early observations are useful, but a quiet first day does not mean the attempt has failed. The culture is still developing.
Establish a Feeding Routine
After about a day, retain 30 grams of mixture and add 30 grams of fresh water and 30 grams of flour. Stir, clean the sides, and mark the level again. This is a one-to-one-to-one feed by weight: starter, water, and flour.
Continue with a consistent routine while watching the culture. In a warm environment, a developing starter may consume food faster than it does in a cool room. Once it becomes reliably active, feeding frequency and ratio should reflect how quickly it peaks and begins to fall.
Do not let the jar grow endlessly by adding fresh flour without removing any mixture. Retaining a measured portion keeps the culture manageable and provides enough fresh food relative to the amount of existing starter. Discard is part of controlling size and feeding conditions.
Expect an Early Rise and a Quiet Phase
Some mixtures rise strongly during the first few days, then become much quieter. That early activity can come from microbes that do not represent the mature baking culture. The quiet phase is a common reason beginners abandon a starter too soon.
Keep feeding and recording rather than declaring success after the first expansion or failure after a lull. Look for a developing pattern across several feeds. Smell and texture may also change as the culture becomes more stable.
Avoid tasting raw starter. Raw flour can carry harmful microorganisms, and early discard is not suitable for casual eating. A developing culture should be judged through appearance, smell, and reliable behavior, with food safety precautions in place.
Keep the Temperature Reasonably Stable
A moderately warm room generally supports faster activity than a cold one. An environment around the low to mid twenties Celsius can be practical, though flour and culture behavior still matter. Excess heat can harm the culture and create unsafe handling conditions.
Be cautious with an oven light or other improvised warm spot. Check the actual temperature and make sure nobody can turn on the appliance with the jar inside. A stable counter location is safer than a heating arrangement you cannot monitor.
If the room is cool, give the starter more time before increasing complexity. Repeatedly changing temperature, flour, and feed ratio can make it difficult to understand the cause of each result. Consistency is valuable during the first stages.
Read the Rise and Fall Pattern
After feeding, an established starter gradually expands, reaches a peak, then begins to settle as available food changes. Marking the starting level shows how much it grows. A line of dried mixture above the current level can reveal that it rose and fell while you were away.
Look for bubbles throughout the mixture rather than only on top. Texture may become lighter and more aerated. The smell should develop toward a pleasantly fermented character, though exact aroma varies. No single scent guarantees that the starter is mature.
Once the pattern becomes predictable, adjust feeding to your schedule. A larger proportion of fresh flour and water relative to starter can extend the time before peak. Learn the effect with a small change instead of switching ratios at random.
Decide When the Starter Is Ready to Bake
A useful starter should expand reliably after feeding over several consecutive cycles and reach a repeatable peak under similar conditions. It should look aerated and smell appropriately fermented. Use a beginner bread recipe that explains the expected starter condition at mixing.
The float test is not a complete readiness test. A piece can float because it contains trapped gas, and a healthy starter may sink if disturbed or made with a different flour. Rise history and consistent performance provide stronger information.
For your first loaf, choose a straightforward recipe and note the starter’s feeding time. If the bread rises slowly, consider both starter strength and dough temperature. Do not immediately assume the flour or kneading technique is the only problem.
Know When to Discard the Whole Culture
Visible mold, unusual colored growth such as pink or orange, or clear contamination is a reason to discard the starter and begin again with cleaned equipment. Do not scrape off the affected layer and keep the rest. Contamination can extend beyond what you see.
A layer of liquid or a strong hungry aroma can occur in a mature neglected starter, but those signs should not be used to excuse mold or an uncertain developing culture. If you cannot distinguish normal fermentation from contamination, choose the cautious option and seek reliable guidance.
Little Lioness’s article on kitchen safety is a relevant companion for keeping utensils and work areas clean. A starter is a living food culture, so cleanliness and sensible inspection belong in the routine.
Handle Discard Responsibly
Discard from the early development phase should be thrown away rather than saved for food. Once the culture is established and safely maintained, mature discard can be used in recipes designed to cook it thoroughly. Do not eat it raw.
Keep only a small starter if you dislike waste. A measured 30 gram retention can support development without producing a large amount every day. Discard does not mean you must maintain a huge jar and continually empty half of it.
Avoid washing thick quantities of starter down the drain. Put unwanted mixture in an appropriate waste container and clean the jar before residue hardens. A neat setup makes the next feed easier and reduces accidental confusion between old residue and current activity.
Maintain a Starter After It Becomes Reliable
If you bake often, a room-temperature feeding schedule may suit you. If you bake less frequently, refrigeration can slow activity after the culture is established. Follow a dependable maintenance routine and allow time for strengthening feeds before a planned bake.
Label the jar with its last feeding date. A simple record helps you distinguish a short pause from a long neglected period. Keep a small culture and build the amount required by a recipe when needed, rather than storing a large quantity indefinitely.
For sharing bread with guests, Little Lioness’s guide to easy dinner planning provides related ideas. Bake a familiar recipe before a special occasion instead of making your first starter experiment part of a tight menu deadline.
Frequently Asked Questions
Why Has My Starter Stopped Rising
An early lull can be normal, but temperature and feeding balance also matter. Keep a consistent routine and review your notes. If the culture has been active and now consumes food quickly, the feed ratio or schedule may need adjustment. Check for contamination before trying to revive it.
Do I Need Commercial Yeast
A basic sourdough starter does not require added commercial yeast. It develops a culture from flour and the surrounding environment. Some bread recipes combine starter with commercial yeast for different practical reasons, but that is a separate recipe choice rather than a requirement for creating the starter.
Can I Use a Starter That Is Only Three Days Old
Do not rely on age or one early rise. Wait for stable, repeatable activity and follow a recipe’s readiness guidance. Early microbial activity can be misleading, and young discard should not be used as though it were a mature ingredient. Patience improves both reliability and confidence.
Follow the Culture Rather Than the Calendar
Learning how to make a sourdough starter means recognizing a dependable pattern. Feed by weight, keep conditions consistent, mark the rise, and discard contaminated cultures. Once the starter behaves predictably, it becomes a practical ingredient rather than a jar you have to guess about.