
How to Do a Squat With Comfortable Controlled Technique
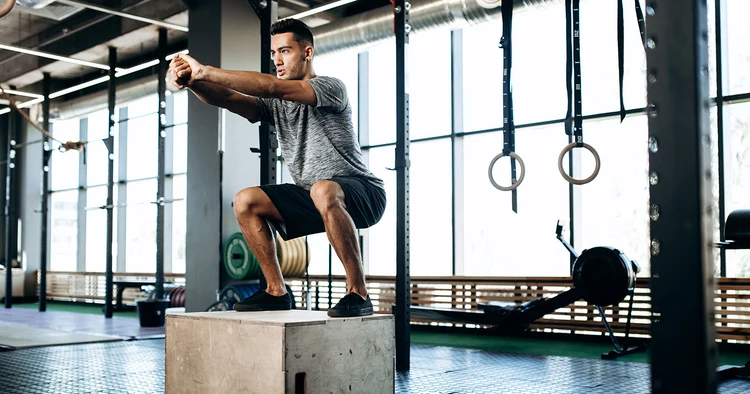
- 2 Views
- johansan great
- October 19, 2026
- Reviews
To do a bodyweight squat, stand with a comfortable base, brace lightly, and bend through the hips, knees, and ankles while keeping balance over your feet. Descend only as far as you can control comfortably, then stand smoothly. Stop for pain or loss of control. This guide covers a beginner bodyweight squat, not heavy barbell lifting or individualized rehabilitation.
Choose a Clear Space
Use a stable surface and remove nearby obstacles. Have a sturdy support available if balance is uncertain.
The first useful distinction is between stable footing and an elaborate workout setup. Keeping those separate makes the choice clearer. Balance depends on a secure environment. The practical aim here is controlled practice, rather than rushing through an action without knowing what it should accomplish.
A common problem is slipping or colliding with furniture. Clear space and choose suitable footwear. Before moving on, check a firm unobstructed surface. That check gives you a concrete result to use, so you do not have to decide from an impression alone.
Find a Comfortable Stance
Begin around shoulder width with a comfortable toe angle. Individual anatomy means one exact stance does not suit everyone.
Think of your stance as a specific part of the task. It should not be confused with copying another person’s feet. Body proportions affect movement. In practice, a balanced start gives this step a clear purpose and helps you judge whether the approach suits your situation.
If you notice forcing feet into an uncomfortable position, pause at this point. Adjust modestly and seek coaching if needed. Look for comfort and stable foot contact before treating the step as complete. The small details matter because a later action cannot always make up for an earlier misunderstanding.
Prepare the Trunk
Keep the torso supported without exaggerated arching or rounding. Breathe naturally during light practice.
It helps to decide what controlled posture should achieve before considering rigid posing. Useful support does not require excessive tension. The intended outcome is steady trunk control. Keep that outcome in view when choosing among methods, because a method that looks convenient can still miss the actual purpose.
Watch for holding breath unnecessarily. Use a comfortable brace and controlled breathing. A useful check is no forced spinal position. Make the decision from what you can verify, and avoid treating a familiar-looking result as proof that every important detail is correct.
Begin the Descent
Bend through hips, knees, and ankles together. Let the hips move while the knees track with the feet.
There is a practical reason to give coordinated movement its own attention instead of folding it into a hip-only bend. A squat uses several joints. The goal is smooth lowering. Approaching it as a separate decision helps you keep the instructions clear and prevents unrelated details from distracting you.
One avoidable difficulty is knees collapsing inward. Reduce range and use coaching or support. Confirm knees following the foot direction. If that confirmation is missing, use the relevant guidance for this step instead of assuming that the rest of the process will compensate.
Keep Foot Contact
Maintain pressure across the foot rather than rising onto the toes. A chair or support can help with a limited practice range.
At this stage, balance over the feet matters more than chasing extra depth. Losing contact changes control. You are aiming for stable support. A clear target makes it easier to choose a sensible next action and to recognize when the current approach does not fit what you need.
Be careful about heels lifting without control. Use a shallower range and reassess stance. Pay attention to balanced pressure and secure heels. This is the detail that makes the advice usable in a real situation, where conditions may differ from the simplest example.
Choose Your Depth
Stop at a depth you control without pain. You do not need to force a universal depth target.
Treat controlled range as a decision you can explain, rather than letting a mandatory low position make the decision for you. Mobility and history differ. The purpose is an appropriate range. That reasoning is useful when you encounter a variation and need to understand which part of the advice still applies.
Do not overlook rounding or discomfort to go deeper. Reduce depth and ask for guidance if symptoms persist. Check control throughout the chosen range. Keeping that point explicit makes the result easier to assess and reduces the chance of continuing simply because you have already invested time in the approach.
Stand Smoothly
Push through the feet and extend hips and knees together. Avoid snapping the knees or throwing the torso backward.
The connection between controlled return and speed deserves a closer look. The upward movement needs the same control. What matters most is a balanced standing finish. Use that relationship to choose the appropriate method instead of relying on a rule remembered without its original conditions.
A sign to reconsider the approach is jerking from the bottom. Use a manageable range and pace. Look specifically for upright balance without abrupt locking. A focused observation is more useful than a broad judgment that something seems right or wrong.
Start With Modest Practice
Use a few quality repetitions and rest. Stop when technique deteriorates rather than chasing a number.
Give priority to quality repetitions when fatigue targets would distract from the immediate task. Tired movement can become less controlled. The desired result is manageable learning practice. Keeping the scope narrow here lets you deal with the relevant issue without adding changes that have no clear purpose.
A frequent source of confusion is continuing after form breaks down. End the set and recover. Verify consistent movement from first to last repetition. That verification should match the actual situation, not just the appearance of a picture or an example with different conditions.
Use a Chair Variation
Practice sitting toward a stable chair and standing, without dropping onto it. Position it safely and use suitable support.
Consider the effect of a supported variation on the result, compared with an uncontrolled collapse. A clear target can help learn range. Your aim is controlled sit-to-stand. This is a useful point to distinguish a necessary action from an optional preference, particularly when several possible approaches seem equally convenient.
Take account of a moving chair. Secure the chair and descend gently. The detail to confirm is the seat remains stable. If you need further help, describe that detail precisely so another person can understand the problem without guessing.
Progress or Seek Assessment
Add difficulty gradually after basic control is reliable. Pain, significant weakness, or rehabilitation needs deserve qualified advice.
Finally, connect appropriate progression with adding load quickly in a way that serves the original purpose. A heavier exercise is a different demand. The outcome you want is training suited to your condition. A good finish checks the result as carefully as the beginning checked the setup.
The issue to avoid is treating pain as necessary. Stop painful movement and consult an appropriate professional. Before considering the task finished, confirm comfort and readiness before added difficulty. That final check helps separate a completed action from a result that is actually suitable for use.
A Practical Example
A beginner can place a sturdy chair behind them and practice five slow sit-to-stand movements. The goal is balanced foot contact and a controlled descent, not the lowest possible position. If the knees or back hurt, stop and reassess rather than adding more repetitions. Progress after the current version is comfortable and dependable.
A Simple First Practice Session
Begin with a sturdy chair behind you, positioned where it cannot slide away. Stand far enough in front that you can lower toward the seat without reaching backward blindly. Use a stance that feels comfortable and lets the knees move in the same general direction as the feet. If balance is uncertain, practice with an appropriate stable support or a qualified instructor rather than an unstable object.
Perform a few slow repetitions, stopping before fatigue makes the movement sloppy. On each repetition, notice whether the heels remain grounded, the trunk stays controlled, and the return to standing feels smooth. The chair is a depth reference, not something to collapse onto. A higher seat can reduce the starting range. When the movement becomes comfortable, you can gradually use a lower reference or perform the squat without the seat.
Do not add weight merely because the first few repetitions were easy. First repeat the movement on another day and check whether it is comfortable during and after practice. Muscle effort differs from sharp pain or joint discomfort. If you consistently shift to one side, lose balance, or cannot find a comfortable range, obtain coaching or clinical advice as appropriate. Progress can mean better control at the same depth rather than going deeper. Keeping a brief note about stance, chair height, and response makes the next session easier to compare without turning practice into a competition.
Related Reading
For broader training habits, read Little Lioness’s workout technique discussion. Apply progressive training principles with exercises suitable for you.
Frequently Asked Questions
Can knees move past toes?
That can occur naturally, depending on anatomy and the task. Do not force a rigid rule; focus on balance, control, and suitable individual guidance.
Should a squat hurt?
Muscular effort differs from pain. Stop for sharp or concerning symptoms and seek appropriate advice rather than forcing repetitions.
When can I add weights?
When the basic movement is reliable and the progression suits your goals and condition. Qualified coaching is useful before substantial loading.
Put the Guide Into Practice
A useful squat starts with stable footing, comfortable range, and controlled movement. Practice a modest number of repetitions and progress when the current version is dependable. Depth and added weight should follow your readiness; pain or persistent difficulty calls for appropriate individual guidance.