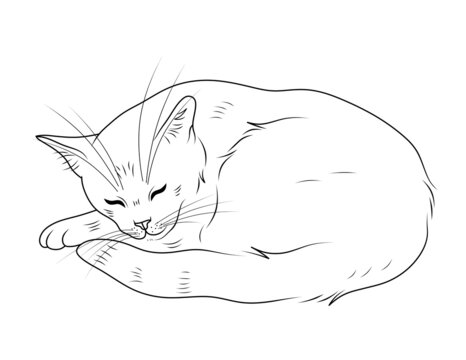
How to draw Cat drawing in 2023
How to draw Cat drawing? Drawing a cat can be a delightful and rewarding experience, even for beginners. Whether you want to create a realistic portrayal or a cute cartoon version, this step-by-step guide will help you learn the basic techniques to draw a charming cat drawing. With some practice and patience, you’ll soon be able to create your feline masterpiece!
Drawing adorable animals like kitty cats can be a fun and rewarding experience, especially when it’s made easy with a step-by-step guide. In this tutorial, we will show you how to draw a cute kitty cat that can be adapted for all skill levels.
Materials Needed:
A blank sheet of paper
Pencils (HB, 2B, and 4B)
Eraser
Sharpener
Drawing board (optional)
Step 1: Basic Outlines
Start by drawing a simple circle for the cat’s head. Next, add a smaller oval shape below it to create the body. You can use light pencil strokes for this initial sketch, as you’ll refine the drawing later.
Step 2: Draw the Ears and Face
Add two triangular ears on top of the head. Then, draw a small oval shape for the cat’s nose in the middle of the face. Beneath the nose, draw a curved line to create the mouth. For the eyes, draw two almond-shaped ovals on either side of the nose.
Step 3: Outline the Body
Now, connect the head to the body by drawing a curved line on each side. This will form the cat’s neck and shoulders. Extend the line on the left side to create the front leg. On the right side, draw a slightly curved line for the back leg.
Step 4: Draw the Legs and Paws
Refine the legs by adding more curves and defining the shape of the paws. Draw small oval shapes for the front paws and elongated ovals for the back paws. Don’t forget to add small lines to represent the toes.
Step 5: Tail and Fur Details
Extend a long, graceful line from the back of the body to create the tail. You can make it as fluffy or straight as you like, depending on the type of cat you want to draw. To add fur texture, draw short and soft lines along the outline of the body.
Step 6: Face Details
Start detailing the cat’s face by adding pupils to the eyes. You can make them round or slit-shaped, depending on the expression you want to convey. Add eyebrows above the eyes and whiskers on both sides of the mouth.
Step 7: Refine the Features
Erase any unnecessary guidelines and darken the lines of your drawing. Add more fur details and shading to give the cat drawing depth and dimension. Use different pencil grades (HB, 2B, and 4B) to create various shades.
Step 8: Final Touches
Take a step back and review your cat drawing. Make any necessary adjustments to ensure the proportions and features look balanced. If you like, you can add a background or some simple elements to enhance the overall composition.
Read Also: How to Draw a Girl: A Step-by-Step Guide
Other way to draw a Cat:
Step 1:
Start by drawing the basic outlines of the cat’s body. Draw a large oval shape for the head and two smaller rounded shapes for the body.
Step 2:
Next, draw the legs of the kitty cat. Since it’s a kitten, the legs will be short and rounded. Add small rounded shapes for the paws.
Step 3:
Now, draw the tail as a rounded vertical outline and add two pointy ears on top of the head.
Step 4:
Proceed to draw the eyes of the kitten. Place them slightly lower on the head with large rounded figures and add big rounded pupils for a cute look.
Step 5:
Draw the lower part of the face, resembling a small mushroom shape. Add a nose and cheeks with two oval shapes.
Step 6:
To add more details, draw the inside of the kitten’s ears. Use small, short strokes to indicate the fur on some areas of the body.
Step 7:
Continue adding details by drawing the toes. Make them rounded and slightly protruding forward with small horizontal lines at the top.
Step 8:
Erase any extra construction lines used in the previous steps. Then, darken the lines of the kitten’s body and use short strokes to create a soft fur effect on the belly, ears, and chest.
Step 9:
Work on the eyes to make the drawing more realistic and lively. Shade the pupils with dense one-layer shading and leave some space for highlights to make the eyes stand out. Add shading to other parts of the kitten’s body as well.
Step 10:
If you followed the steps correctly, you should now have a cute kitty cat drawing. Congratulations!
Remember, practice is key to improving your drawing skills. Don’t hesitate to try drawing different poses and expressions for your kitty cat. The more you draw, the better you’ll become. Have fun and enjoy your creative journey!
We hope this step-by-step guide on drawing a kitty cat was helpful to you. Your feedback is valuable to us, so please let us know your thoughts and suggestions. Happy drawing!
Conclusion:
Drawing a cat can be a delightful and enjoyable experience, especially when you follow a step-by-step guide. With practice and patience, you can create cat drawings that capture the essence of these graceful and mysterious creatures. Remember, there’s no right or wrong way to draw a cat—each one can be unique and special. So, grab your pencils and paper, and let your creativity flow as you embark on your cat-drawing journey! Happy drawing!
Read Also: How to Change Your Airdrop Name: A Step-by-Step Guide

