
How to Test Smoke Detectors and Keep Alarms Working
- 2 Views
- johansan great
- October 24, 2026
- Reviews
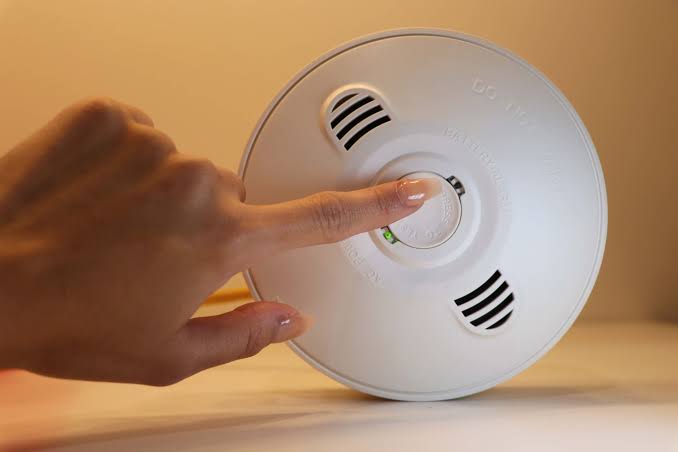
Test household smoke alarms at least monthly using the test button and the manufacturer’s instructions. A loud response is important, but testing also involves checking age, power, location, and whether everyone can hear or otherwise receive the warning. Replace ordinary residential smoke alarms around ten years after manufacture, or sooner when the model instructions or faults require it. Never use an open flame to test an alarm. This guide explains a safe monthly check and how to respond to a chirp, a failed test, or an alarm that has reached the end of its service life.
Locate Every Alarm
List the alarms in your home, including bedrooms, areas outside sleeping rooms, and every level including the basement. Check local requirements and the manufacturer’s placement guidance.
The first useful distinction is between complete coverage and testing only the most visible unit. Keeping those separate makes the choice clearer. An overlooked alarm can leave part of the home unprotected. The practical aim here is a complete inspection list, rather than rushing through an action without knowing what it should accomplish.
A common problem is forgetting a basement or bedroom alarm. Walk through the home and record each unit. Before moving on, check whether required areas have suitable protection. That check gives you a concrete result to use, so you do not have to decide from an impression alone.
Identify the Model and Power Source
Read the model information and manual. Determine whether the alarm uses replaceable batteries, a sealed battery, mains power with backup, or a connected system.
Think of model-specific operation as a specific part of the task. It should not be confused with one procedure for every alarm. Different systems have different test and maintenance details. In practice, the right instructions for each unit gives this step a clear purpose and helps you judge whether the approach suits your situation.
If you notice removing parts before identifying the system, pause at this point. Find the manual using the exact model number. Look for the correct test and battery procedure before treating the step as complete. The small details matter because a later action cannot always make up for an earlier misunderstanding.
Check the Manufacture Date
Look for the manufacture date and the recommended replacement interval. Ordinary home smoke alarms commonly require replacement after ten years; some models or faults call for earlier replacement.
It helps to decide what service life should achieve before considering whether the button still sounds. An old alarm can be overdue even if it responds. The intended outcome is timely replacement. Keep that outcome in view when choosing among methods, because a method that looks convenient can still miss the actual purpose.
Watch for counting from installation when the manufacture date is older. Use the date and interval specified by the manufacturer. A useful check is the unit’s actual age. Make the decision from what you can verify, and avoid treating a familiar-looking result as proof that every important detail is correct.
Prepare for a Loud Test
Tell household members that a planned test is happening. Use safe access, such as a stable step stool where appropriate, and avoid standing on unstable furniture.
There is a practical reason to give safe preparation its own attention instead of folding it into surprising everyone. The sound can be startling and the alarm may be high. The goal is an orderly safe check. Approaching it as a separate decision helps you keep the instructions clear and prevents unrelated details from distracting you.
One avoidable difficulty is balancing on a rolling chair. Use stable access or an approved remote test method. Confirm whether you can reach the control safely. If that confirmation is missing, use the relevant guidance for this step instead of assuming that the rest of the process will compensate.
Press the Test Button as Directed
Hold or press the test button for the duration specified by the manual. Listen for the expected response. A short tap may not activate every model’s sequence.
At this stage, the specified button procedure matters more than an improvised smoke test. The manufacturer designs a particular test method. You are aiming for a clear test result. A clear target makes it easier to choose a sensible next action and to recognize when the current approach does not fit what you need.
Be careful about using a lighter under the detector. Use the button and any further approved procedure only as directed. Pay attention to whether the expected sound occurs. This is the detail that makes the advice usable in a real situation, where conditions may differ from the simplest example.
Check Interconnected Responses
If the alarms are interconnected, verify the response described in the manual throughout the home. Ask another adult to confirm what they hear in distant rooms when useful.
Treat system response as a decision you can explain, rather than letting the local unit alone make the decision for you. A working local sound does not necessarily confirm the whole network. The purpose is a warning that reaches the household. That reasoning is useful when you encounter a variation and need to understand which part of the advice still applies.
Do not overlook assuming every unit sounded without checking. Test according to the interconnected system’s instructions. Check which alarms respond and where the sound is audible. Keeping that point explicit makes the result easier to assess and reduces the chance of continuing simply because you have already invested time in the approach.
Respond to a Failed Test
If no sound occurs, follow the manual’s troubleshooting procedure. Replace an allowed removable battery if needed and retest. Replace a faulty unit promptly or obtain qualified service.
The connection between a failed alarm and postponing maintenance deserves a closer look. A silent alarm cannot provide its intended warning. What matters most is restored protection. Use that relationship to choose the appropriate method instead of relying on a rule remembered without its original conditions.
A sign to reconsider the approach is leaving an unresponsive unit in place. Arrange replacement or service immediately and maintain appropriate protection. Look specifically for whether the alarm passes after the permitted fix. A focused observation is more useful than a broad judgment that something seems right or wrong.
Treat Chirps as a Message
Use the manual to distinguish low-battery, fault, and end-of-life signals. A full alarm during an unplanned situation should be treated as a possible emergency, not dismissed as a battery issue.
Give priority to signal meaning when guessing from one beep would distract from the immediate task. Different patterns indicate different conditions. The desired result is the correct response. Keeping the scope narrow here lets you deal with the relevant issue without adding changes that have no clear purpose.
A frequent source of confusion is removing a battery to stop the noise permanently. Identify the signal and correct its cause. Verify whether the pattern matches the documented warning. That verification should match the actual situation, not just the appearance of a picture or an example with different conditions.
Maintain Without Disabling
Clean the alarm as the manual permits and replace batteries according to its instructions. Do not paint it, cover it, or disconnect it to stop nuisance alarms.
Consider the effect of proper maintenance on the result, compared with silencing the system. Contamination and disabling can reduce protection. Your aim is a functioning maintained unit. This is a useful point to distinguish a necessary action from an optional preference, particularly when several possible approaches seem equally convenient.
Take account of leaving a battery out after cooking smoke. Address placement or nuisance causes through approved guidance. The detail to confirm is whether the alarm remains powered and unobstructed. If you need further help, describe that detail precisely so another person can understand the problem without guessing.
Pair Testing With an Escape Plan
Review a household escape plan and an outdoor meeting place. Consider hearing, mobility, and accessibility needs; suitable linked alert devices may be needed. Test monthly again using a reminder.
Finally, connect response planning with the equipment check alone in a way that serves the original purpose. An alarm gives a warning that people must act on. The outcome you want is a household prepared to leave safely. A good finish checks the result as carefully as the beginning checked the setup.
The issue to avoid is having no agreed plan when an alarm sounds. Practice the plan and seek local fire-service advice where helpful. Before considering the task finished, confirm whether everyone can receive the warning and escape. That final check helps separate a completed action from a result that is actually suitable for use.
A Practical Example
On the first day of the month, you check the alarm list and warn everyone about the test. Each alarm responds to its button except an older upstairs unit. Its manufacture date shows that it is beyond its service life, so you arrange replacement rather than repeatedly pressing the button. You also verify that the interconnected alarms can be heard from sleeping areas and review the household’s outdoor meeting point.
Related Reading
Include alarms in a broader household routine using Little Lioness’s home maintenance tips. A reminder is useful only when you also complete the actual checks.
Frequently Asked Questions
Can I test an alarm with a candle?
No. Do not use an open flame. Follow the test-button procedure; use any manufacturer-approved test product only when the instructions specifically require it.
Are smoke and carbon-monoxide alarms identical?
No. They detect different hazards, though some products combine both. Test and replace each function according to the exact model instructions.
Should I replace a sealed battery?
Do not open a sealed unit to replace its battery. Follow the instructions, which commonly require replacing the entire alarm when indicated.
Put the Guide Into Practice
Monthly alarm checks should include the test response, age, power, and household coverage. Correct faults promptly and keep alarms enabled. Review whether everyone can receive the warning and follow the escape plan, because working equipment and a practiced response support each other.